You may remember my exciting purchase of a Print Gocco last summer. I had many elaborate plans for using the adorable Japanese screen printing machine for wedding projects. Unfortunately Adobe Illustrator and my home printer won out and the poor Print Gocco was only used once. But the results were lovely and well worth the splurge to buy it!
What IS a Print Gocco, you ask? Check it out online here.
I used mine to print the covers of my passport programs!
We designed the cover and inside pages in Adobe Illustrator. The cover I screen printed with my Gocco. The inside pages included our wedding party, ceremony outline, in memorial and a list of things to do between the ceremony and reception (always important when there is a gap!). We scattered vintage passport stamps throughout the pages. The inside pages were printed on my home computer.
My husband (then fiance!) and I had an assembly party with our DVR and a glass of wine.
And here is our finished product!
I love them! And they fit our theme so well. Success!
As I already mentioned, this month my cousin, Amanda, got married. It was a great opportunity for me as the maid of honor to observe her planning process and practice a few things for my own wedding. Because I am the family crafter, I offered to help with as much of the DIY as Amanda was willing to pass off to me. The final list included her garter, ring bearer pillows, silk flowers for bridesmaids’ hair, and shoe clips for the bride.
I had made pillows before, so those were easy. I used these DIY instructions for the garter and it turned out perfectly. As for the shoe clips.... Well, here you go!
1 . Supplies - I stopped and Joann’s and picked up a few fabric remnants in white and ivory satin and tulle. There was more than enough fabric to play with and remnants are 50% off! I also had a pair of vintage clip-on earrings I’d found a few months earlier at a local vintage shop. I used a small metal cutter to clip off the earring back. The alligator clips pictured were what I originally planned to use, but they were too tall and long so I switched to the bobby pins.
2 . Cut 3” wide strips of fabric. I started with several fabrics, knowing I could play with layering to find the look I wanted. I ended up using only one strip of the white satin for each clip. Layering with the ivory tulle was “too much.”
3 . Fold your fabric strips in half length-wise and pin. Sew a wide running stitch (the widest you can do on your machine) down the length of the fabric. I only ended up using a piece that was about 8-10 inches long for each shoe. I cut the fabric after stitching the entire length. It was MUCH too long, so feel free to trip it down and save some time or keep the full length and layer it like this.
4 . To ruffle the fabric,pull on one of the two threads at the end of your stitches and push the fabric down to create a gathered effect. Even out the gathers and pin in a circle.
5 . Hot glue the back (least pretty side!) to a circle of felt. 6 . Secure/hide the raw end of the fabric with a bit of hot glue.
7 . Secure a bobby pin to the back with a square of felt and more hot glue. Be sure you hide the bobby pin completely behind the flower.
8 . Turn it over and secure the gem/earring/button of choice to the front with more hot glue.
9 . Repeat for shoe clip #2.
And voila! It was one of the simplest DIY projects I’ve ever done. If you don’t have a sewing machine, use a wide hand-stitch. Don’t they look beautiful? Amanda ended up taking them off of her shoes and putting them in her hair by the end of the night... that might have also been after a 4 hour open bar :) In her hair or on her shoes, they looked lovely!
As promised, here are instructions for the belt and hair tie I created with 2 of the silk flowers.
I added a little bit of lace to one and then attached it to a ribbon to create a belt.
As you can see, I bought two metal D-shaped rings and sewed them to the ribbon with my sewing machine. Then I hot glued the flower to the front of the sewn end.
To create a hair tie like this:
I hot glued the flower to the metal clasp on an elastic hair tie and then hot glued a small square of felt to the back, over the metal clasp.
They were so easy! I gave both to a girlfriend for her birthday and she loved them! At least she said she did :) Don't forget to enter to win the third flower. I can make it into a pin or hair clip. Or a belt or hair tie if you'd prefer.
The first time I tried on a veil I had a minor panic attack. I am slightly claustrophobic and the full, chapel-length veil they put on me was quite heavy. I'm leaning toward a beautiful floral hair-piece instead. It may include a little bit of netting, perhaps a small bird-cage bit of veil, but the jury is still out.
After finding several DIY tutorials on how to make silk flower accessories, I decided to try my own.
Step 1: Purchase a variety of silk flowers and beads. I found flowers at Michael's and the Dollar Store. Michael's had a better variety, but the Dollar Store flowers worked just as well and were much less expensive! I chose a variety of pearls and crystals from Michael's.
Step 2: select one flower and take it apart. The plastic center and back should come off easily releasing the flower petals. You can throw out the plastic pieces, they won't be used
Step 3: Lay out petals and begin layering. I staggered the petals to create depth, but they can be arranged in any way that you like best!
4: Select the beads you want to use and sew them and the flowers together.
The Final Result!!
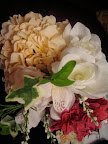
I liked it so much that I made a few more:
I am going to turn these first attempts into accessories. The first two I am giving to a good friend for her birthday. I turned one into a ribbon belt and the other into a hair tie. Those tutorials will come tomorrow! Also, I'll be giving away one of my flower creations to a follower sometime this week, so stay tuned!